You haven't signed in yet, you can have a better experience after signing in

{{ item.spec_option }}
{{ item.spec }}
System
¥{{ random.sku_info.price }}
Reference price
How TextSeek Works
Efficient and precise search
Full text search for each Chinese and English character
When Windows' default search takes a long time to search and ultimately tells you that it was not found, or even some files are not found right under your nose, it often makes people very angry. By introducing advanced technology, TextSeek can solve such problems. It uses full text scanning technology to find all the text (not lost due to segmentation errors) and displays search results like Baidu. The software has good support for Chinese, and the interface supports 14 languages including Chinese, English, Japanese, Korean, French, German, Arabic, etc.
Support for various documents
Searchable file names and specific content
TextSeek supports multiple document formats, including Word, Excel, Powerpoint, PDF, WPS, OFD, and more. All format parsing is integrated into TextSeek, without the need to install additional packages. Unlike other desktop search tools, the file name of the document and all text content are integrated into the search engine to avoid text omissions.
Ultimate search experience
Customize search scope
In TextSeek, you can specify directories to be indexed to speed up searches (in regional mode), or search directly without indexes (in simple mode). In addition, TextSeek provides four sorting methods and multiple filters to improve search accuracy, and also supports quick browsing of search results through shortcuts. Its functions also include regular expression search, keyword highlighted summaries, and previews, which are beneficial for users to more efficiently locate the desired text.
{{ app.qa.openQa.Q.title }}
TextCeek - Windows Version Search Guide?
TextCeek provides two search modes:Regional mode and simplified modeUsers can switch modes by clicking the tab button in the upper right corner.
The region mode is used to search for fixed commonly used folders and is a long-term usage mode. In this mode, documents in the area will be pre scanned, so the search speed is fast and the search results are complete and without omissions.
Simple mode is a temporary mode used for searching folders outside the search area or for frequently changing search scopes. In this mode, users only start scanning documents after clicking search, so the simple mode search is slower, but as soon as a match is found, it will be displayed. The search process will continue until the user clicks the stop button or all documents are scanned.
First, let me introduce the simple mode. In this mode, you can only search for a single folder. This mode requires setting the target folder first. If you have not set it before, a dialog box will pop up for you to select the folder to search for. In the large search box at the top of the main interface, enter search terms (separated by spaces) and click "Search". The search results are as follows:
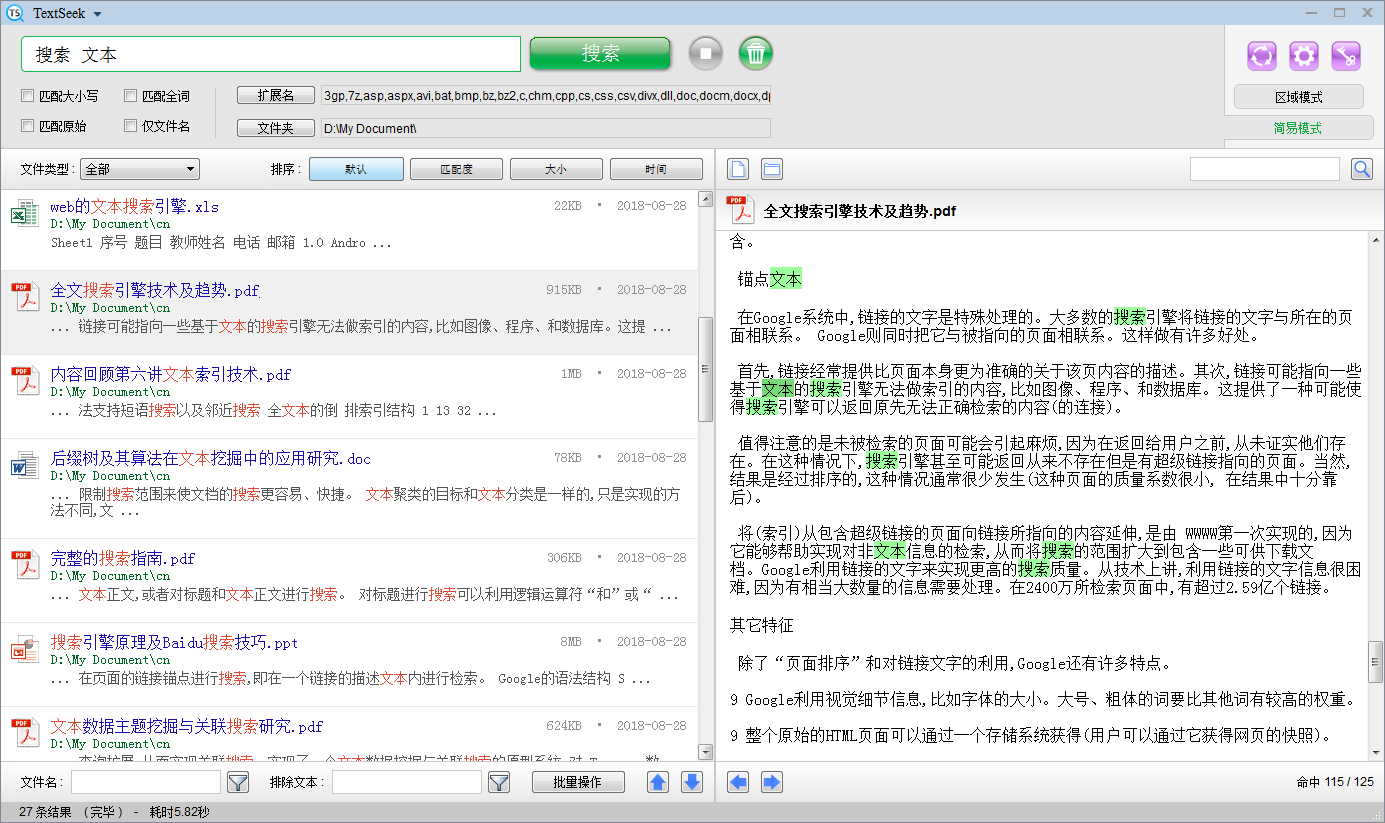
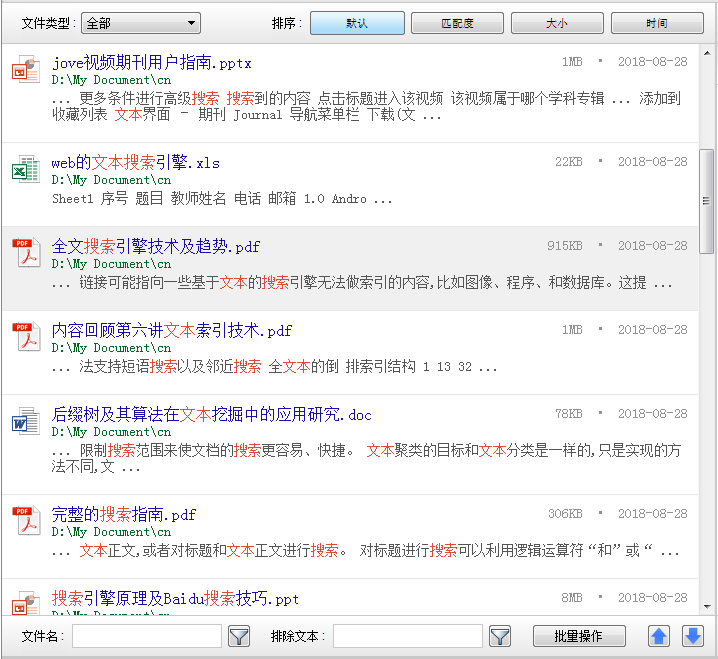
The bottom left corner is the search results bar. Each block inside represents a file containing keywords. You can click on the link in the file name to display a document preview on the right, or double-click the link to open the document. At the top and bottom of the search results bar are various tools for processing search results:
(1) Top left corner: Filter by document type.
(2) Top right corner: Sort in four ways. Among them, both ascending and descending sorting are supported for sorting file size and modification time.
(3) Bottom left corner: Filter by file name or exclude files containing specific content.
(4) Bottom right corner: The "Batch Processing" button can batch process the searched documents (copy, cut, delete, and export). The up and down arrows can be used to browse the files found item by item.
The document preview bar is located in the bottom right corner. The two buttons in the upper left corner of the document preview bar are used to open files or corresponding folders; The search bar in the upper right corner is used to locate other keywords in the preview bar; The left and right arrows in the bottom left corner are used to browse the keywords you have hit; The character in the bottom right corner displays the current order of hit keywords. If you want to quickly browse search results and keyword hits, you can use the shortcut of Ctrl+arrow keys to achieve it.
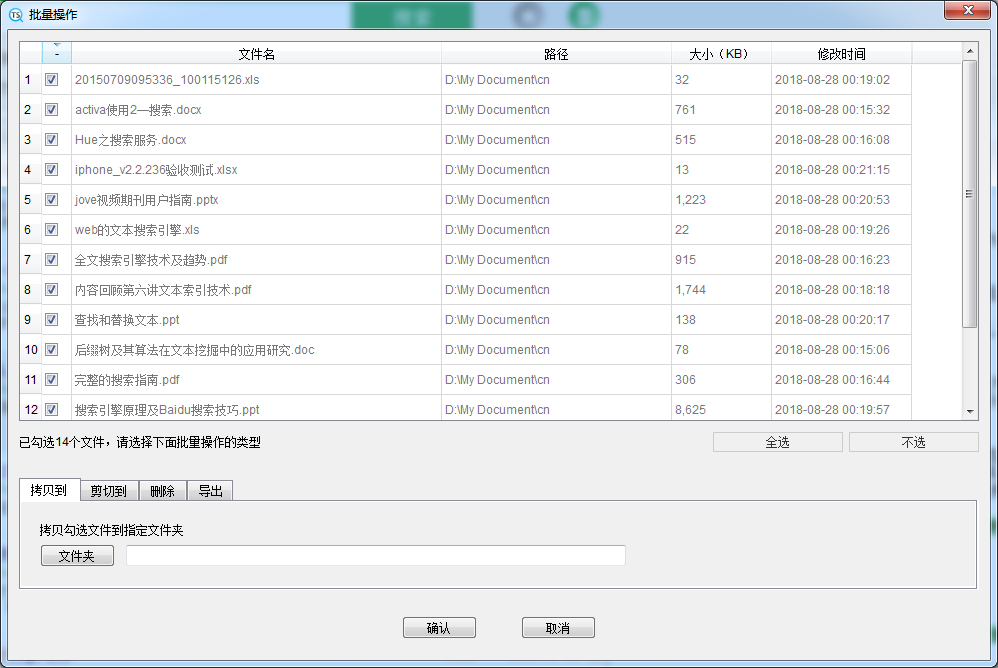
After searching, if there are search results, click the "Batch Processing" button to batch process all search results that meet the criteria. In the pop-up window, you can copy or cut all relevant files to a specified directory, delete them all, or export all search result information.
Below the search bar are the basic search options. The search function of TextCeek is character level, so searching for 'fi' will match 'refined'. If you want to search for documents with multiple words appearing simultaneously, please separate them with spaces; If you want to search for multiple words that appear randomly, please separate them with the keyword 'or'; If you want to search for regular expressions, please start with the keyword "re:" (click here to learn more); If you want to search for phrases composed of two or more words, you can use quotation marks (such as "go to").
If you want to search for whole words (mainly used in English), check "Match all words"; If you want to directly match the original text (such as keywords including spaces and quotes), check "Match Original", just like searching in Notepad; If you only want to match the file name and not the content, check 'Match file name'. The "Extension" and "Folder" buttons on the right allow you to further customize the search with the specified extension and search path.

If you are sure that the search results are sufficient, you can click the circular green button on the left to stop the search. If you want to clear the search results, you can click the circular button on the right.
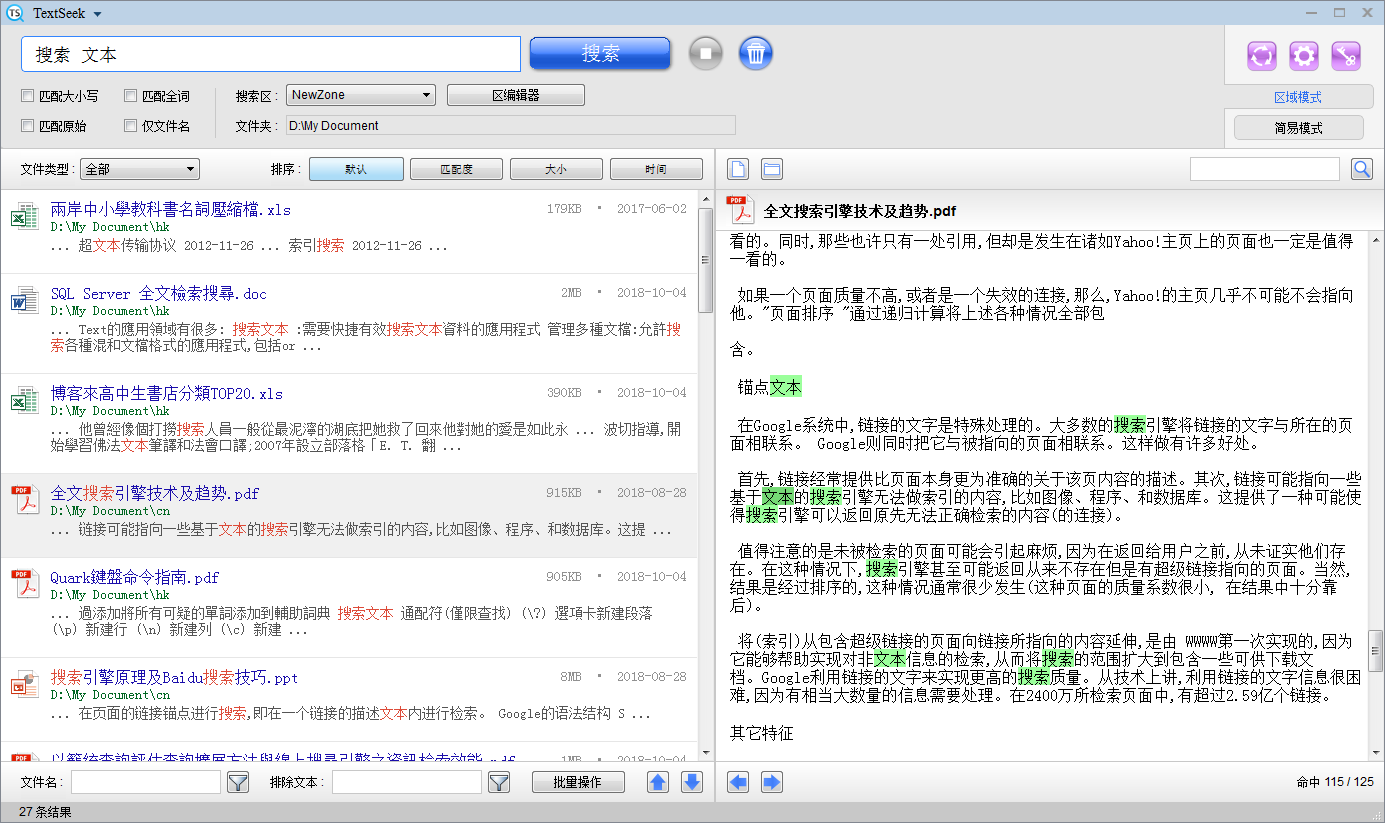
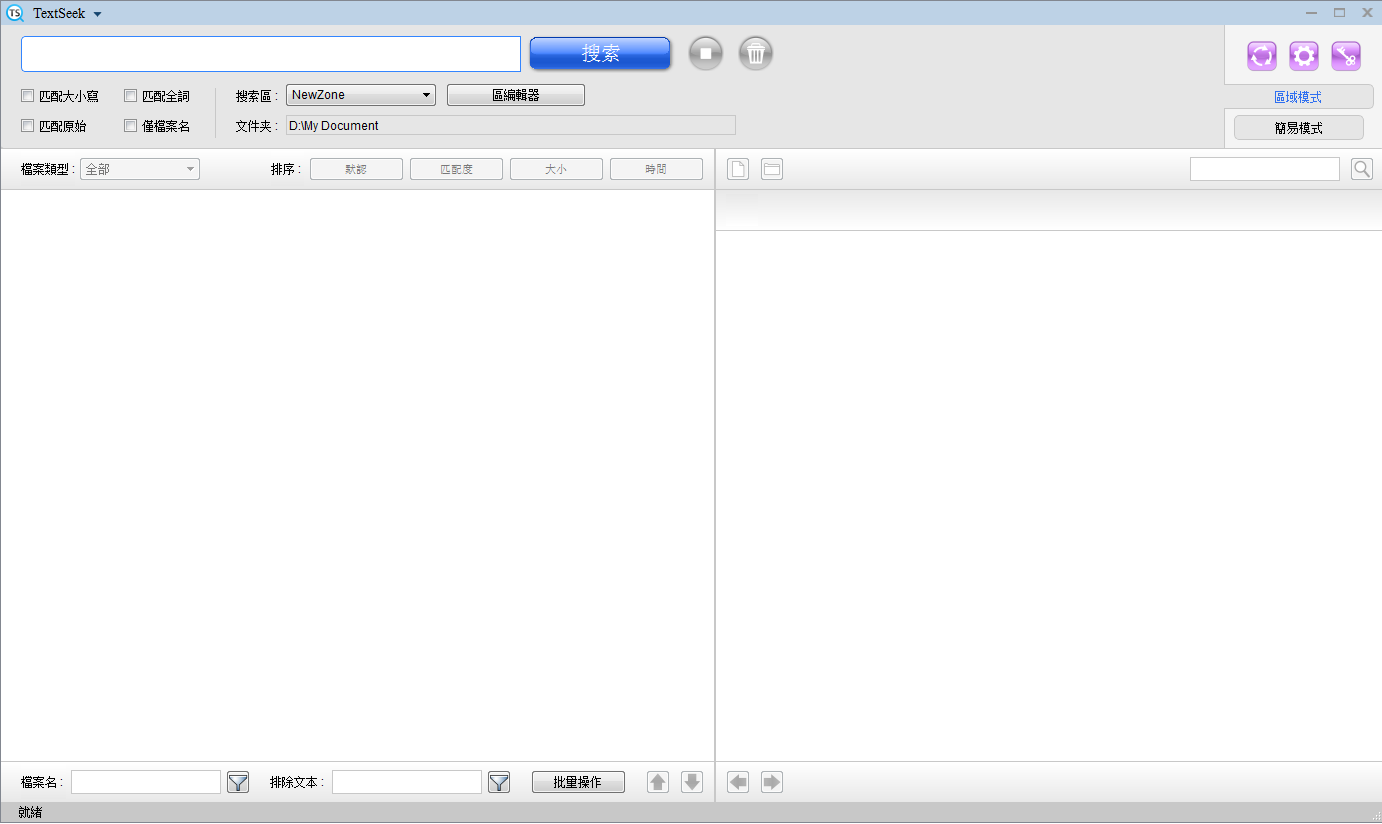
Next, let's introduce the regional mode. Click the "Regional Mode" button on the right to enter, and the search interface will turn into a blue style.
If you enter for the first time and need to initialize the regional mode, the following dialog box will pop up. Click "Yes" to enter the settings wizard page.

The area represents the search scope, including the folder and file type to be searched. TextCeek will intelligently set the default zone for you. If you want to change the area, click "Edit" (click here to learn more). If you have confirmed the area, click 'Next'.
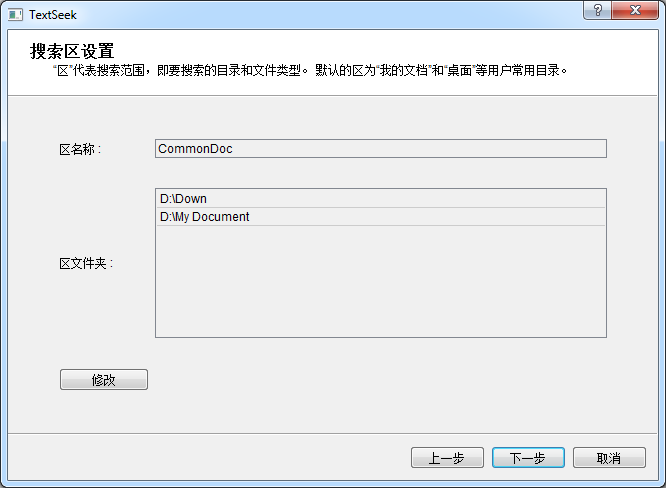
Then TextCeek starts scanning the area to retrieve the file content. After a few minutes, the 'Finish' button can be clicked. Click on it to end the wizard page.
After the wizard page, the main interface of TextCeek will be as follows:




Bargaining


